There are a lot of Chocolate Chip Cookie recipes out there and, of course, I turned to Alton to give me the ultimate recipe. This is a favorite because you don't need to use a mixer to make it. I've arranged my kitchen so that my mixer is in a very easily accessible place, giving me as few excuses as possible NOT to use it, but still a recipe that doesn't require the mixer seems easier.
I make only two changes to Alton's recipe:
1. At the end, before scooping out the dough, I add 4 Tablespoons of milk. For whatever reason, this dough comes out a bit crumbly and is difficult to scoop into cookie balls for baking. I often have to form the balls with my hands and really compact the dough together in order to keep it's shape - it's very time consuming.
 |
| Packing the dough into the scoop so it stays together. |
 |
| The little mounds it makes. |
 |
| ARGH! Why are you so crumbly, dough?! |
 |
| Wet dough, much easier to scoop! |
2. I use salted butter AND add salt to the recipe. I call this my secret weapon for this recipe. I do not think this results in a salty cookie, but, rather, one with a salt element. Alton advises against using salted butter in your recipes because you cannot control how much salt a specific brand of butter uses - and if you use different brands each time you make a baked good, how can you control the salt? I think this is a perfectly fair point - but let's just say I've been using salted butter my entire life and I've always been happy with the results.
Ingredients (Wet):
1/2 pound of salted butter (2 sticks)
3/4 cup white granulated sugar
3/4 dark brown sugar, lightly packed (yes, sugar is considered a wet ingredient!)
2 egg yolks, beaten
2 teaspoons of pure vanilla extract (oops, I made three changes! I added an extra teaspoon of vanilla extract. I'm gonna start doing this with all baked goods now: vanilla is typically used to enhance the other flavors, but the flavor of vanilla is just so good - I want more!)
Ingredients (Dry):
2 1/4 cups all-purpose flour (I actually used Trader Joe's 100% White Whole Wheat Flour to much success, but more on that later)
1 teaspoon baking soda
1 teaspoon kosher salt
2 cups semi-sweet chocolate chips (equal to 1-12 oz. bag of chips)
Finisher:
3-4 tablespoons milk
Here's the order and process I use:
- Melt your butter

- Once the butter has melted, then measure out your ingredients in two separate bowls. Do not add the butter until all the ingredients have been measured, so it has time to cool slightly.
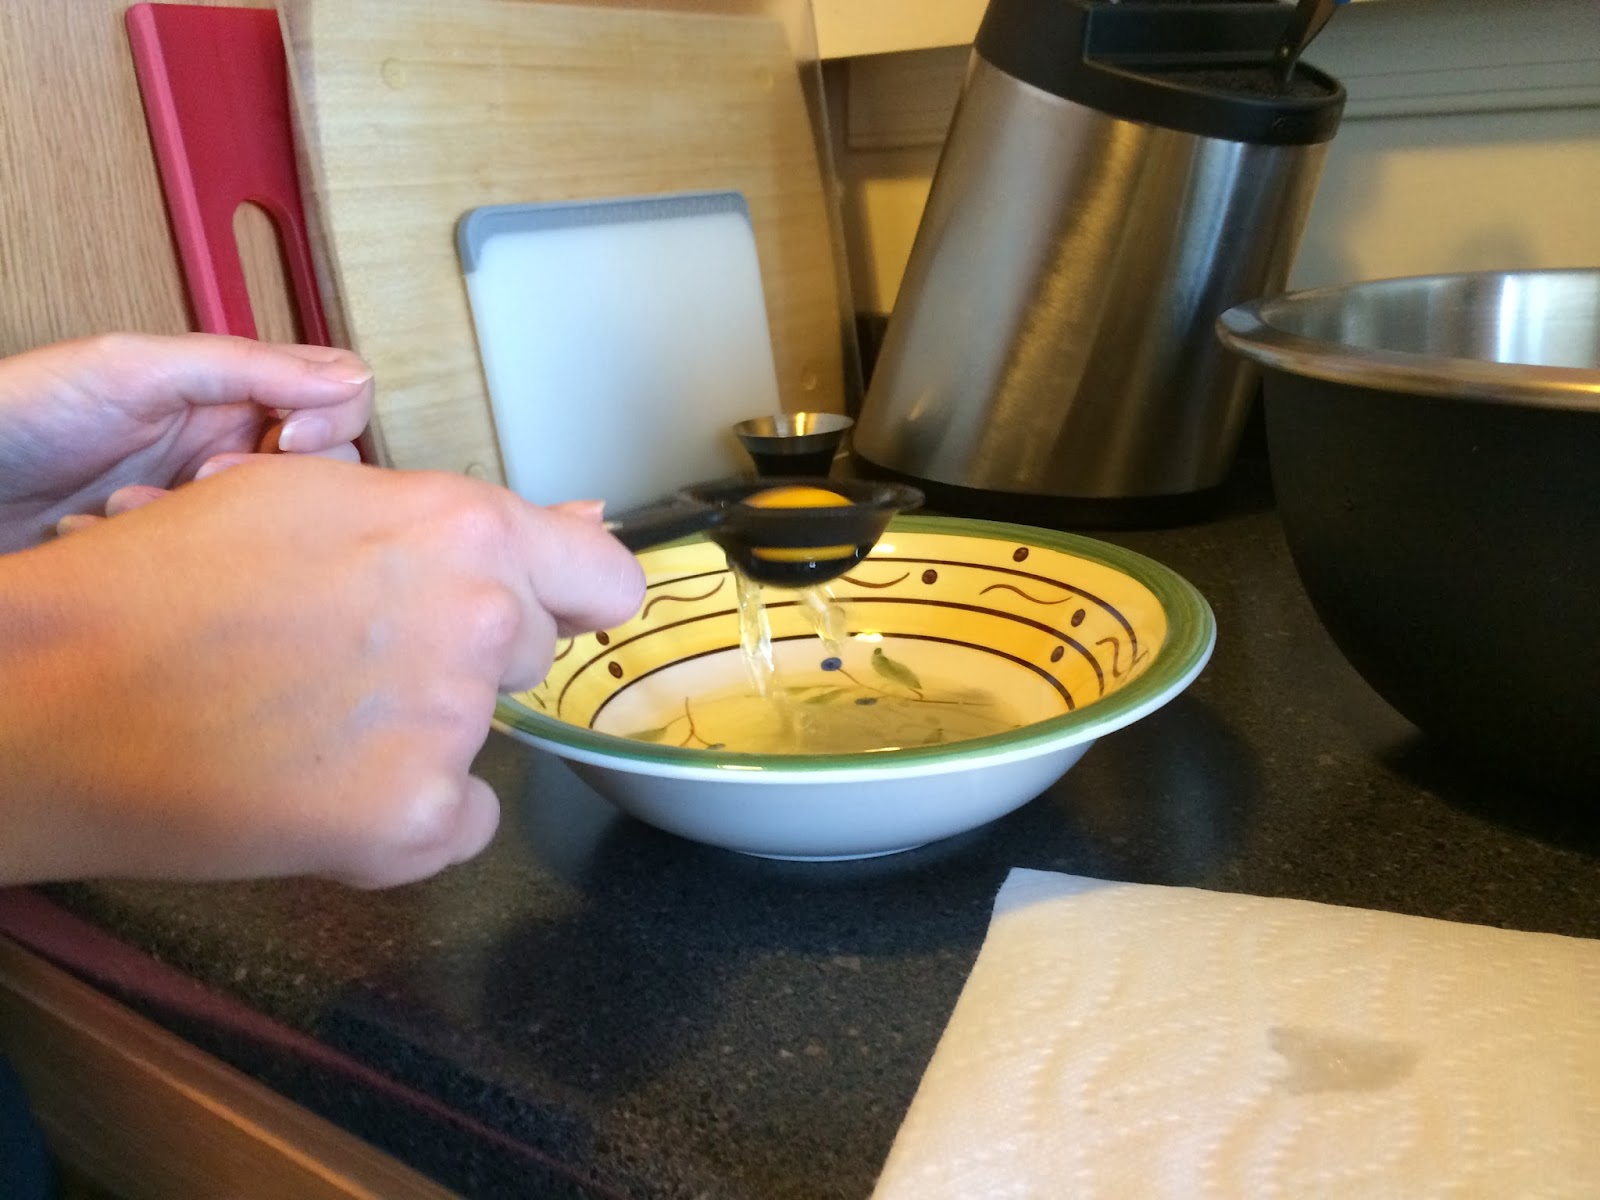
- Separating egg yolks from egg whites can be tricky, but there's several utensils out there to help you out. Some people swear by using the egg shell to separate or even your fingers, but I find this guy pictured here to be best. It came with my measuring cup set, but can be found for pretty cheap online.

- Just crack your egg (I use the counter covered with a paper towel, as Alton suggests, so as not to ram egg shell into the egg itself) and empty over the separator. Then gently jiggle the egg white off of the yolk. The last bits of egg yolk can be a little difficult to jiggle off, so you may want to use your fingers.


- The Trader Joe's Whole Wheat Flour didn't really change the flavor at all in the baked cookie (I could taste it in the raw dough), and adds fiber to your baked good. I call it a win-win!

- I sift all my dry ingredients by shaking a hand-held sieve. Alton likes to put all his dry ingredients in the food processor and pulse about five times. I've tried this and it is faster - but washing the food processor takes longer than washing the sieve. So I prefer the sieve.

- The whole wheat flour does not sift all the way - there's little chunks that were bigger than my sieve holes. I just threw that back in the dry ingredients when I got to the end. Sifting is more a process or aerating than it is fishing out big chunks.

- Pour your melted butter into the other wet ingredients and thoroughly combine.


- Pour your wet ingredients onto the dry ingredients and fold gently until just combined. Don't worry if there are streaks of flour in there.


- Then add your milk, one tablespoon at a time, until the dough is wet enough to scoop easily. (I've actually never done this with a full recipe. I've gotten pissed off half-way through scooping and added 2 Tablespoons of milk to half a recipe. So logic would say that a full recipe would need 4 Tablespoons, but I would go slowly just in case. Don't let me ruin your cookies!)

Adding the milk

Easy to scoop! - Scoop your cookies out onto pans that are lined with parchment paper or these nifty silicone mats, which are both nonstick.

- Bake your cookies for 15-17 minutes, depending on your oven. Mine took 15 minutes.
- Every five minutes, I rotate my cookie pan 180 degrees and switch the cookie pans on the racks. This ensures that the cookies cook evenly - none are more crispy than the others.
- Let your cookies cool on the pans for 2 minutes before transferring them to cooling racks. This accomplishes a few things: 1. It allows the cookies to cool down more gently. 2. The cookies will firm up so it's easier to transfer them to the cooling racks. 3. It allows your cookie sheet to cool down before they next batch of dough goes on.

NOM. - I used to ignore the cooling stage in many cookie recipes and it never ruined any cookies. But I do notice that this short amount of time allows my cookies to be more uniform - the dough never starts melting before the cookies get in the oven.

Without milk on the left. With milk on the right. See the difference!

- The recipe yields about 40 cookies.
- Eat your cookies warm - that's when they're best!

I've been getting lots of good feedback about the blog so far and I thank you so much for reading! If you've got a pro tip, a question or a comment, please share in the comments below! The whole point of writing this blog is to share and learn - so let's start a conversation! :)
Have you noticed a difference between cookies made with melted butter versus creamed butter? Shape, texture, taste? I think I tried this recipe once, but I refrigerated before baking and found the dough incredibly difficult to work with.
ReplyDeleteThat's a great question! This is the only recipe I've ever tried with melted butter vs. creamed. I had problems both when I refrigerated the dough before and when I didn't. I poured through Alton's baking cook book last night trying to find out WHY he preferred the melted butter/muffin method for this cookie, but he never says!
ReplyDeleteThe muffin method (melting butter, adding wet to dry ingredients) versus the creaming method (mixing room temperature butter with sugar before adding dry ingredients) is supposed to yield different texture results. Think of it as a muffin vs. a cupcake - they should have different textures, the cupcake being much more uniform because of creaming. But it's harder to notice in a cookie.
I guess it's up to us now - we'll just have to do a side-by-side comparison, one with melted butter and one with creamed, to see if the melted butter is really worth the hassle. The family is going to be devastated to have to undergo that taste test... ;)