Sunday, March 9, 2014

Red Meat Days

Over this past year, I've been thinking a lot more about making healthier choices.  But as someone who loves to eat (and loves to eat poorly) as much as I do, this is daunting task.  James and I decided to start small.  We love to eat and we love to eat meat - but there's been enough studies that an abundance, shall we say, of red meat in your diet can lead to disease.  Therefore, we decided that we should try to cut back.  And the only way we thought we could stick with it was to make a hard, measurable rule: eat red meat only twice a month.

Red meat, by the way, has been defined by most nutritionists currently as "meat from any mammal."  So it's not just beef: it's bison, it's lamb, and saddest of all, it's pork.  Perhaps, like me, you thought that pork was "the other white meat."  Apparently, this is merely very excellent marketing by pork industry lobbyists.  Don't get me wrong, there are cuts of pork that can be very lean, but at this moment in nutrition history pork is lumped together with beef as a red meat.

I mentioned that we really love meat in our house - and that's how "red meat days" came about.  Instead of only eating red meat in two meals per month, we started to declare when we would take a "red meat day" and then try to fit in as much red meat as possible during those 24-hours.  We are... realizing that that's sort of defeating the purpose and are trying to cut back on that trend as well.

However, we've made some really great discoveries with this experiment.  And the most obvious one is how much red meat we eat in this country - especially at restaurants.  James and I go out to eat a lot, it's basically one of my favorite activities besides cooking in my own kitchen.  I love to be inspired by menus, I love a nice ambiance, great service - I love the whole experience.  But, as I mentioned in an earlier post, I can't eat cheese.  And now I can't eat red meat.  And holy crap, does that narrow down your choices!  The number of dishes that come with bacon alone are astonishing once you've limited the number of times you can eat it.

What's also amazing is, although James is a great lover of bacon, we hardly ever eat it anymore.  Because when we eat red meat, we make it count.  It's almost always steak.

This Valentine's Day, like last Valentine's Day, we decided to stay home and make some delicious steaks.  We got out to dinner so often (probably too often) that isn't worth it to go out on Valentine's Day.  They jack up the prices like crazy on this holiday, so why waste the money for the same food we could eat on another night?  No, damn the man.

Last year, I looked up a process to make the most delicious, crusty steak on your stovetop and in a pan, because my apartment is not grill-friendly.  I found the instructions on Serious Eats (a fantastic food website filled with both great instruction and foodie whimsy which I recommend).  This recipe comes from The Food Lab, when one of their writers heads into his tiny New York City home kitchen to test recipes and procedures ad nauseum until he's figured out how the home cook can achieve great results in their own home kitchen.  Seriously cool. :)  There's a lot of interesting little tips in this process, and I encourage you to read it, but below I detail the ones that I found most important and took to heart.

The number one intriguing tip is the suggestion that you flip your steak every 15 seconds.  I'd always heard that for the perfect sear you 1) get your oiled pan super-freakin'-hot, 2) slap your meat down and 3) DON'T MOVE IT.  You can test it after a few minutes and when the steak can be easily removed from the pan, that's when you flip.  But this "15-second rule", if you will, cooks your steak quickly and still achieves that crusty yum we all want.

(I want to admit that this was the first time we started taking pictures for the blog and so the 15-second-rule was kinda hard to capture.  We didn't always achieve 15-seconds -often more like 30 - and I did overcook the steak more than I would have liked.  It was still good, though!  I recommend taking the steak's temperature often so you can create the doneness you desire.)

Point 1: Choosing your steaks.
When I went to my local Trader Joe's (the best prices on pretty much anything), I had four choices for a steak that was going to be the star of our meal: Filet mignon (often marked as Tenderloin), Sirloin, New York Strip and Ribeye.
From most to least expensive...
Filet  - I'd never attempted this cut before - actually a very lean cut of beef, yet very tender - and also the most expensive.
Ribeye - more expensive and highly marbled (those white lines of fat.)  My personal opinion is that the steak is too fatty for the cost - I don't actually enjoy all that fat.
New York Strip - for me, the sweet spot.  Plenty of marbling and a price point (these were about $10 per steak) that I can get behind for a special dinner.
Sirloin - the least expensive and rather lean, but I find that it can be tough.

Ooh, pretty.
You also want your steak to be between 1" - 2" thick.  I think, for this application, I might have had more success with a thicker steak: it would have given me more time to create a crust yet not cook the inside so much.  You can see here that my steaks are 1" thick.

Point 2: Season those suckers good:
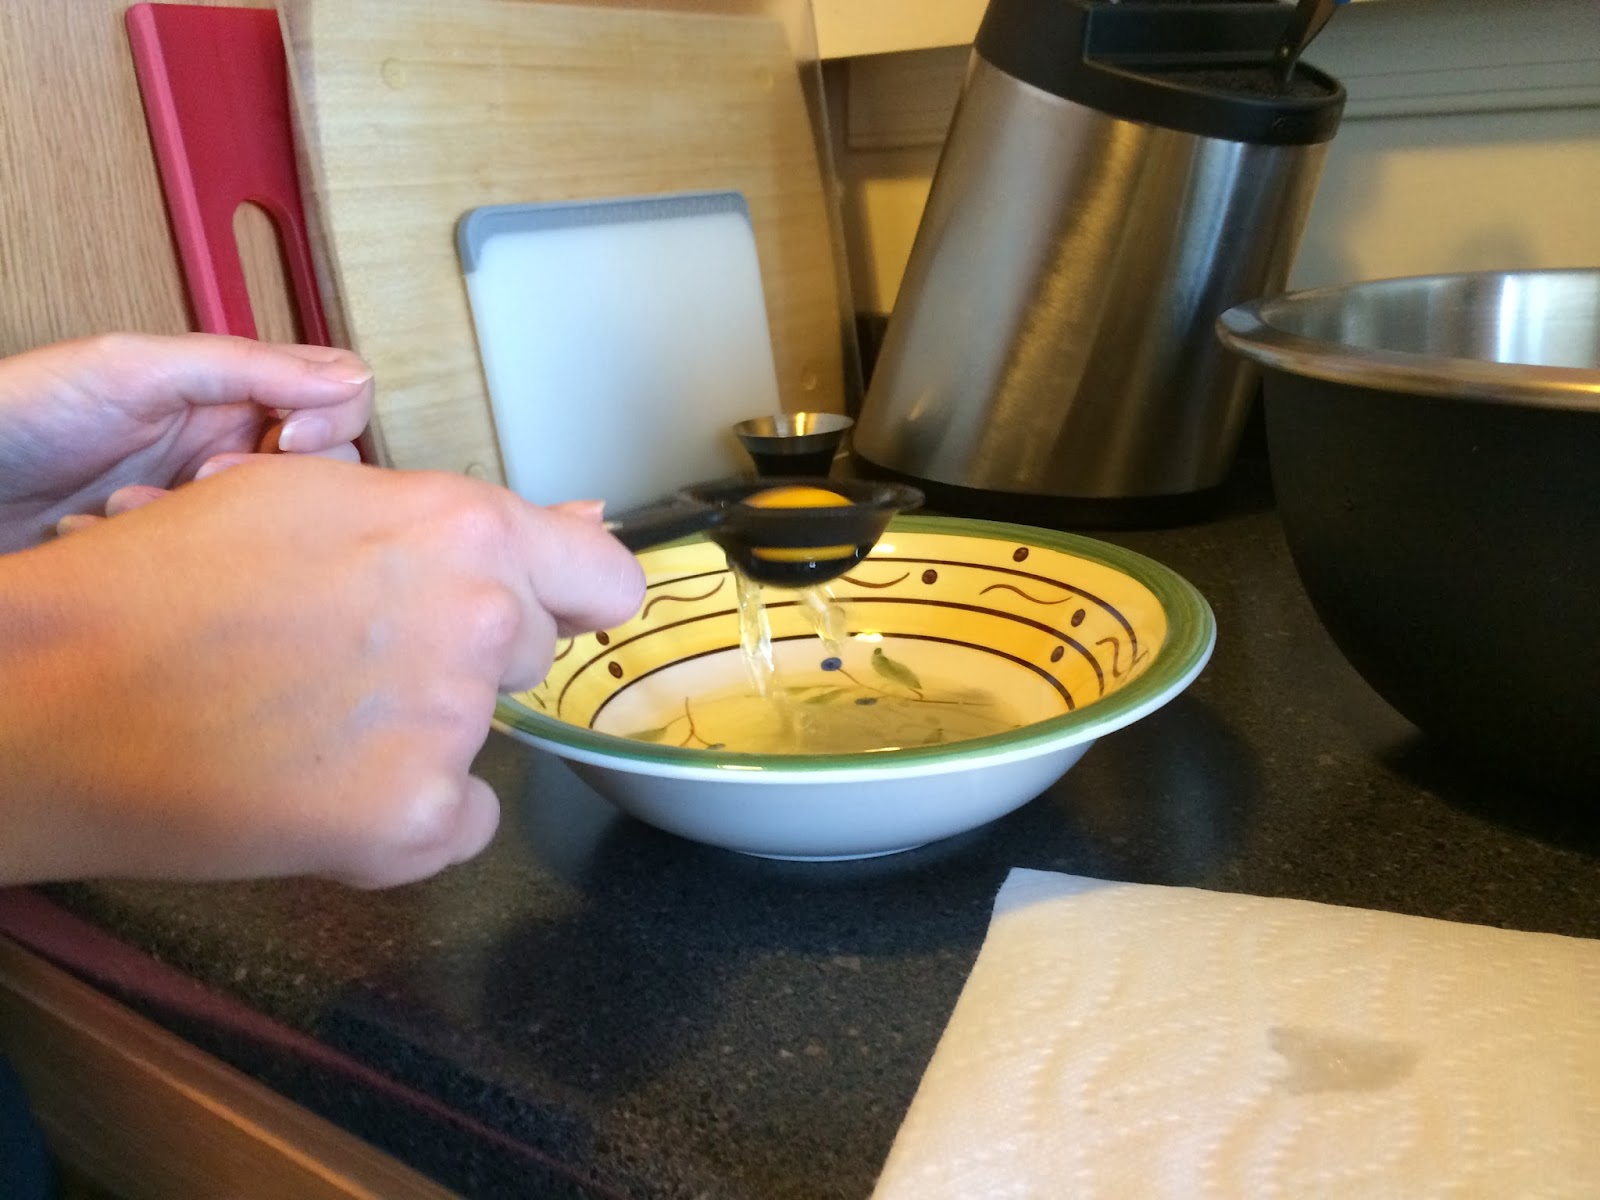
Serious Eats suggests that you season your steaks more than you think you need.  I used kosher salt and cracked black pepper.  Freshly ground black pepper changed my life.  Cracking your pepper immediately before adding it to your food releases the oils in the peppercorn, making it more flavorful and offering more bite.


I like to season my steak on one side, add that seasoned side to the hot pan, then season the other side in the pan.  That way you don't lose as much seasoning in the transfer.


Point 3: 15-second-rule
Flip your steaks every 15 seconds, take the temperature of the steaks as often as possible for proper doneness (130 degrees is the target mark for medium rare.  You'll want to cook your steak to about 120-125 degrees, because the carry-over heat will continue to cook the meat when it's removed from the heat source.)  I show the progression of my steaks below.


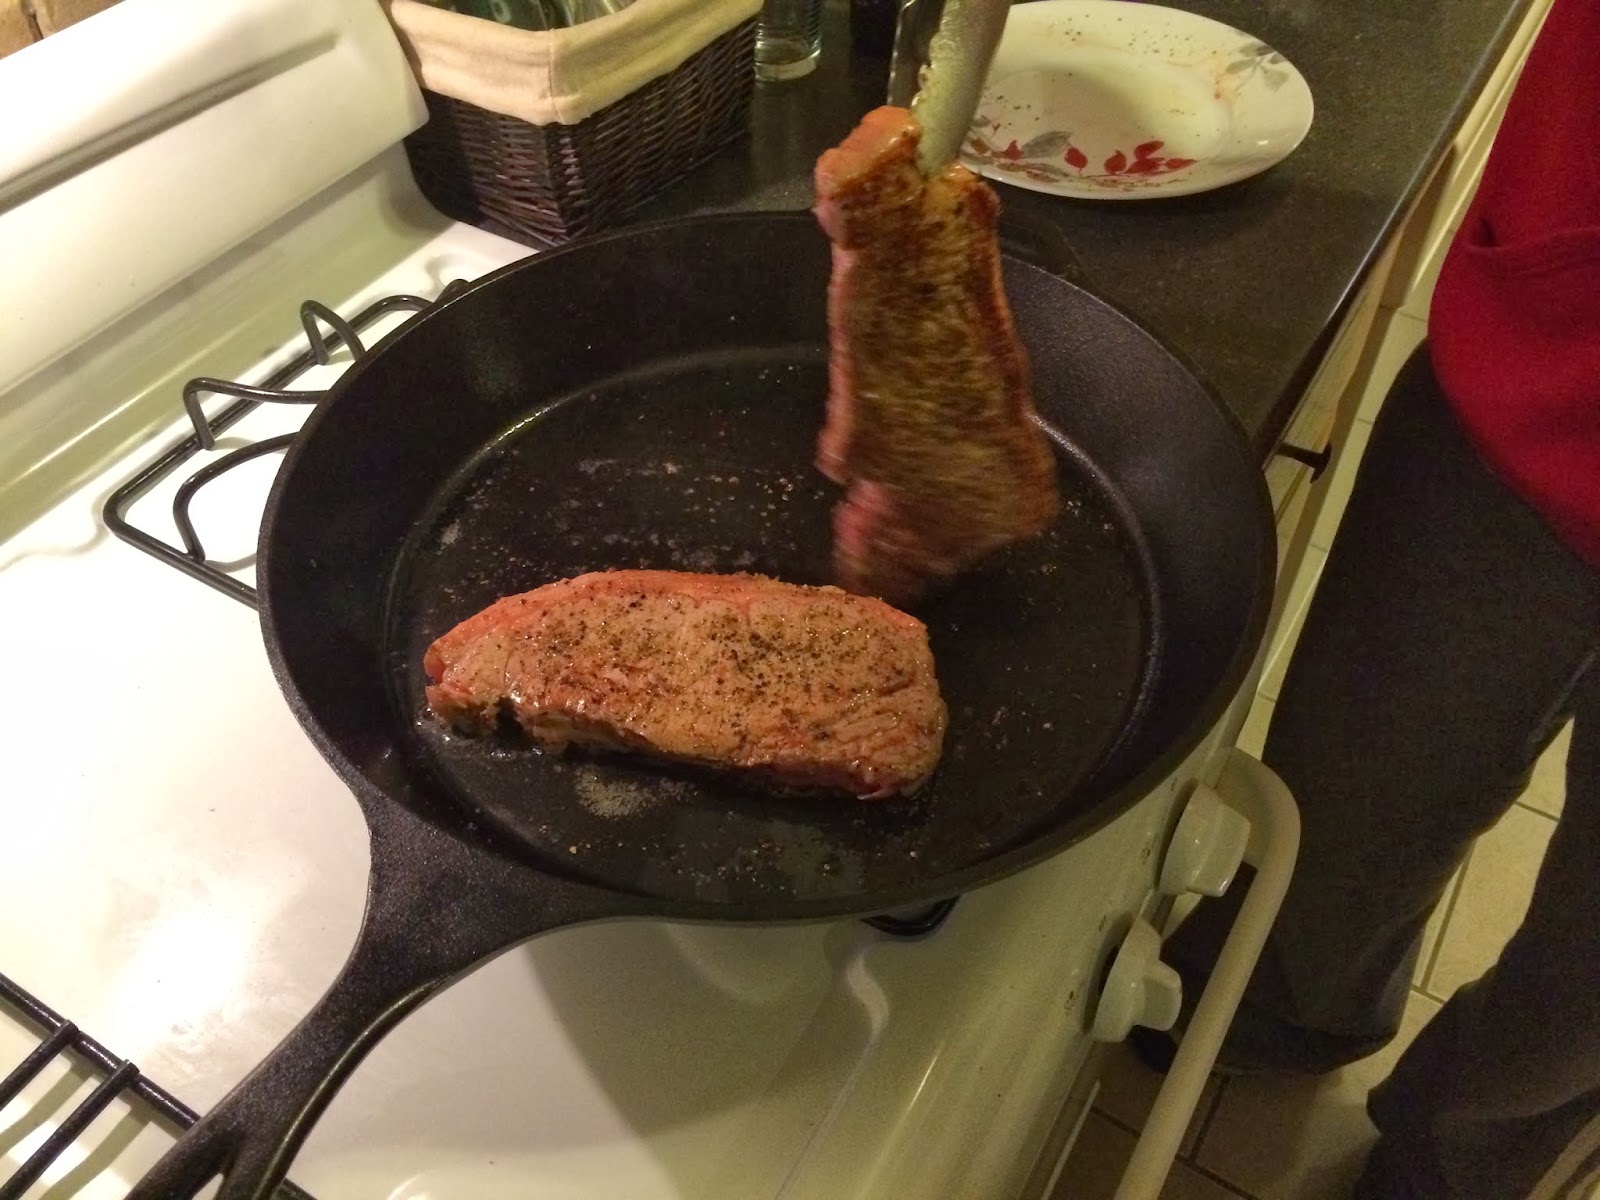
(You'll see that butter was added to the pan and basted onto the steaks.  This was suggested, but I wasn't a big fan of the result.  The idea is that the fat, an excellent conductor of heat, would get the the steaks crusty in places where the pan couldn't touch, but I thought the addition of fat was overkill, and took away from the flavor of the steak itself.  Just my two cents, though.  I know most professional chefs add butter to their steaks at the end.)

There you have it!  Know that you can have a delicious steak at home and it doesn't have to be on the grill.  For the home cook you can have it fast with a few simple guidelines in mind.

Have you made steak in a pan at home?  Have any tips, questions, comments, concerns?  Hit me up in the comments.

An intimate dinner at home, served with Trader Joe's potato latkes and arugula salad.

Friday, February 28, 2014

A Surprising Reminder


I've been trying to write about my glorious brush with Alton Brown greatness for days now.  I had the most terrific time!  It should be noted that we were not, in fact, in the front row but the fourth row.  This was for the best because we could see better and were still very close to the stage... and therefore very close to Alton.  ::blush::

The stage which was decked out with Good Eats paraphernalia like the T-rex spray bottle, the K'nex molecule model, and Bessie the cow!  Yeast puppets made several cameos via a large screen at the back of the stage.  The crew was made up of Good Eats production team members (now you can tell how nerdy I truly am because I actually recognized some of these guys.)  Itchy of "Itchy and Twitchy" was a frequent player, Alton's meddling lawyer who never lets him have any fun (or blow stuff up.)


There were tons of in-jokes for huge nerds like myself, lots of talk about food, lots of ranting from Alton, lots of crazy, large contraptions.  Everything that I was expecting.  But what I wasn't expecting were all the wonderful personal stories that Alton would tell about his early career and about his family.  I wasn't expecting him to sing, play the guitar and play the saxophone with incredible dexterity.  And I wasn't expecting Alton to control the crowd the way he did.  Alton's career was mostly in TV and I thought that maybe the transition to the stage, especially in front of a 3,000-person crowd, would be a little more awkward for him.

Not at all.  While he seemed genuinely flattered and perhaps even humbled by the enthusiasm of the crowd when he first appeared, he thrived off the energy like a seasoned theatre actor.  And the crowd deserves some of the credit as well - these were really my people.  One of my favorite moments came right at the beginning of the show when Alton introduced his camera man who would be providing close-ups of any cooking or other experiments.  He said to the crowd "Everyone, say hello to Trevor" and without missing a beat the entire audience replied in unison "HI TREVOR!"  "See, they're very nice here!" Alton assured Trevor.  It must be really cool to make a cooking show for 13 years and then get to tour like a rock star.

It is fulfilling to admire someone so much, to allow them not only into  your living room but your kitchen, and get a pay-off like this when you finally see them in person.  Alton was hilarious, kind and charismatic.  His inventions were insane.  I learned more about food, especially his thoughts on organic food ("I wouldn't pay an extra dollar for organic food if you put a gun to my head, because I don't know what organic means anymore!"), and learned that we completely agree about salt.  And I watched him completely melt when a 3-year-old girl in the front asked him if she could have some pizza.  He climbed down to the end of the stage, picked her up onto his lap and fed her the pizza himself.  There's nothing I like better than a celebrity who's nice.  It was an amazing night and I won't forget it.  I thank James a million times over for keeping an eye on these tickets and getting them for us so quickly so we could be that close to the front.


And then another surprising thing happened.  After the show, I found myself especially missing my Mom.  I told many people who love me about Alton the next day and they politely listened, some even seemed interested.  They were certainly glad that I had a good time.  But my Mom would have been so excited to hear everything about it.  I can imagine her in the kitchen as I came to the door, as she so often was, seeing me wearing my "Alton Brown Live" shirt and saying "Oh, look at her, she's even wearing his shirt, she's such a dork!" and grabbing me for a big hug. She would have asked me how it was and listened raptly to every dumb detail.  She would be so interested, I would be encouraged to keep telling her stuff that she really didn't care about at all.

Because my Mom didn't like to cook; unlike so many other food enthusiasts, mine is not because of a bond with my mother.  Even though she fed her four children and husband a home-made meal every weeknight (and most weekend nights), she really couldn't have cared less about cooking.  It was something she did to feed her family.  Frankly, she rarely threw a new recipe into the mix and some of them weren't even that great.  So she certainly wouldn't be interested in Alton Brown, someone who dissects cooking and food with such fervor even I think he goes overboard occasionally.

But my Mom was there when I saw my very first Good Eats episode (it was about strawberries.)  I was watching Food Network in her living room, as I often did, and she was sitting on the loveseat reading her paper.  I was exclaiming things like "Oh, that's interesting!" and "Oh, I never knew that!" and she would look up over her paper and her glasses, see Alton dressed as a farmer and say "That guy's weird."  And she'd laugh at me for how excited I was getting and tell me that I was weird, too.

Then she'd go on to buy me almost every one of Alton's books.  She'd sit in the living room that very same way, reading the paper on the loveseat, as I watched Alton and she would listen to me repeat all of the facts I was learning back to her.  She would sit in the kitchen with me just to keep me company as I was attempting some of his ridiculously hard recipes.  She's make sure his specials were DVRed for me and clear the living room so I could enjoy them in nerdy peace.

So when I finally got to see Alton Brown live, something I wanted to do for years, I never would have predicted that the show would have stirred up these feelings of loss inside me so acutely.  She hardly ever seemed to really care about the cooking facts I would tell her: she even made fun of me for it.  But if I was excited about something, she would listen to me with matched enthusiasm.  Not because of what I was telling her, but simply because I was happy.  She loved other people, loved me, so much that my happiness made her happy.  And I think this was one of the first times since she passed away that I was this giddy about something.

(In the past 5 months, I've sailed across the San Francisco Bay under the Golden Gate Bridge at sunset, hiked up Diamond Head, and seen the most incredible feats of acrobatics in Le Reve in Las Vegas, yet Alton Brown was what made me the most giddy.  I'm truly a lost cause.)

Since my Mom died, a lot of people have told me how, after their parents died, they would still pick up the phone and try to call them, so natural was the impulse to want to talk to their parent.  That hasn't happened to me. But I realized after I saw the show that I was feeling this emptiness the next day and I couldn't figure out why.  Was it because I didn't get to go up onstage and meet him?  Was it because I had such a good time and now it was over?  No - it was because I didn't get to do the play-by-play with Mom.

I know I never told her how much I appreciated her enthusiasm.  I really wish I did, but Reenie wasn't affectionate like that.  She wouldn't have liked it if I said it outright.  She would have said "Oh, you are so nice" and then looked at me slightly suspiciously.  But I hope that she knew somehow that she was everyone's favorite person to talk to.  I hope she knew by the sheer amount of times I came specifically to her to tell her things she actually didn't care about.  There's no one who makes you feel important like Reenie did.

Saturday, February 22, 2014

A Week of Alton Brown Day 7: Overnight Oatmeal

Today is the day, ladies and gents!  James and I will drive to Baltimore in just a few hours to see Alton's Edible Inevitable Tour at the Lyric Opera House.  In the front row.  Did I mention that before?


I'm so excited!!

To celebrate, we're ending our week of Alton Brown recipes with Overnight Slow-Cooker Oatmeal.  This is another that we've made many times.  James is the slow-cooker expert in the house and tinkered with the recipe to get it just the way he likes it.

Ingredients: 
Non-stick cooking spray
1 1/4 cups steel cut oats
2 cups dried cranberries (less if you like your oatmeal a little more savory)
1/2 cup half & half
4 cups water

Procedure:
  • As the title states, you prepare this Oatmeal the night before you'd like to eat it.
  • Spray the crock of your slow cooker with cooking spray and wipe down with a paper towel.
  • Measure out your ingredients and dump them into your crock.
    • Steel cut oats look different than other kinds of oats.  They're essentially whole "groats" that have the hull removed (but not the bran, so there's still lots of nutritional goodness) and are cut into pieces about the size of sesame seed.  They take a longer time to cook and are traditional in Ireland.

    • I enjoy these whole dried cranberries from Trader Joe's because they're not quite as sweet.  Cranberries, besides adding flavor, are rich in antioxidants.  But you can use any dried fruit that you'd like.  Alton's original recipe had a cup of dried figs, but those were too sweet for us.  Golden raisins or dried cherries could also be great in this recipe!
  • Give the contents a stir before clapping on the lid.
    • On other crock pots James has owned, we've found that laying kitchen towels over the edges of the lid helped to keep the food moist.  His current model has a tight seal on the lid, so we don't find that necessary anymore.
  • Set your slow-cooker on low for 8 hours.
  • Go to sleep!
  • When you wake up in the morning, you'll have delicious, ready-to-eat oatmeal.  It will need a stir and I admit - it won't be pretty.  But when is oatmeal really ever pretty?


    • James and I have had trouble with the oatmeal drying out on the sides, but we always have plenty to eat for the two of us - even leftovers.  We believe it's because the slow-cooker is so large.
I hope you've enjoyed the week of Alton Brown and that you'll check him out on YouTube or Hulu.  He has been a huge inspiration to my cooking and I'm sure I'll be talking about him many more times in this space.  A true lover of food and cooking and fun in the kitchen - which is what it's all about for me.  


Friday, February 21, 2014

A Week of Alton Brown Day 6: Buttermilk Biscuits

YOU GUYS I GET TO SEE ALTON BROWN TOMORROW OMG!!!!!

This is ridiculously exciting!  Almost as exciting as how easy it is to make your very own BUTTERMILK BISCUITS.

There was a time when James and I were indulging quite a bit in Pilsbury biscuits out of a can.  We hadn't eaten them in a long time and it's nostalgic - they're so easy and it's so fun to pop that can open violently with a knife.  (How is it that Mom could always do it so easily and gently by pressing in the exact right spot with a spoon?  The can suffers grave injustice at my hands.)

But then one day we looked to see how biscuits were made from scratch.  And the recipe looked pretty easy.  So then we attempted it, and lo and behold, making them was relatively quick, didn't require fancy hardware, and it was fun, too!  And homemade biscuits... oh my goodness... Pilsbury cannot compare.  (No disrespect to Pilsbury, they are still delicious but the texture is way way off.)

There are a lot of biscuit recipes out there and this one isn't even Alton's favorite, but it's mine.  We make only very minor adjustments to make this perfect for us.  Someday, I promise, we'll do a step-by-step version of this but for now you can watch Alton and his adorable Ma Mae go head-to-head baking biscuits.

Adorable video here!
You'll see Alton is weighing his dry goods.  I don't doubt that this makes a great baked good, but I've tried weighing and not weighing on the chocolate chip cookies from earlier this week and... I'm just not buying it.  It takes too long and stuff I make still tastes great.  Once I found out Alton's own mother told him she wouldn't read his cook book if he only weighed the ingredients, I felt justified in ignoring him. ;)

Recipe here!

  • We use all butter instead of shortening and butter.  I'm pretty sure I still have the can of shortening that I bought for this recipe in my pantry.  There's just no flavor in shortening!
  • Cold fat is absolutely key for biscuits.  Make sure you don't take the butter out of the fridge until you're absolutely ready to use it.  I recommend cutting the butter into little cubes and throwing it in the flour.
  • Biscuit-cutter not required (although I haven't tried one, and it might be handy!)  I use a round cookie-cutter and, in a biscuit emergency, even used a glass that was roughly the right size to cut the biscuits.  Definitely harder that way, but it works.  James' dad is still talking about the biscuits we made with the glass cutter, so I think it worked out.

Tomorrow - incredibly easy Overnight Slow-cooker Oatmeal that greets you ready-to-eat in the morning.

Oh right... AND ALTON!!!!

Thursday, February 20, 2014

A Week of Alton Brown Day 5: Buttermilk Pancakes

I'm noticing that I'm getting lots more hits on this blog when I'm actually cooking something.  That's awesome!  I am sorry that I can't deliver that every night this week.  My confession is that I don't cook that often on weeknights - I get home around 6:15pm and James not usually until 6:45pm.  Sometimes we cook together and don't end up eating until 8:30pm!  So it doesn't happen often.

Our usual routine is to cook bigger meals on the weekends and eat leftovers all week, often preparing fresh vegetables to go along with it.  It's hard because we both travel a lot and try to visit family and friends as often as possible, but that is the system that works best.

So today is another post of a recipe without pictures but that I have made many times: Buttermilk Pancakes.

If you like to make pancakes often, the recipe Alton provides in the video below is actually his own homemade "instant pancake mix."  You add buttermilk, butter and some eggs and you're ready to roll.  But, sadly, I don't make pancakes that often, so I've adjusted his recipe down to just one serving, which is the recipe you'll see below.

A great Alton video-description of the process!
Times of certain parts of the process are noted below

Alton Brown's Buttermilk Pancakes (1 batch of 12 pancakes)

Ingredients:
2 cups all-purpose flour
1/2 teaspoon of baking soda
1 teaspoon baking powder
1 teaspoon salt
2 teaspoons sugar
2 eggs
2 cups buttermilk
4 Tablespoons melted butter

Procedure:
Similar to the Chocolate Chip Cookies earlier this week, we're going to use the Muffin Method for these pancakes.  Which simply means: mix wet ingredients together, mix dry ingredients together, pour wet onto dry, fold until just combined.  For some reason, any recipe made by this method makes it so much less daunting for me.  Therefore:

  • Mix together eggs, buttermilk and melted butter
  • Mix together flour, baking soda, baking powder, salt and sugar
  • Pour the wet ingredients onto the dry and mix gently until they are "just combined" (2:06 on the video)
  • Get your pan nice and hot and then add your pancake batter (we don't usually butter the pan, because there's so much butter in the batter it doesn't seem to need them.  But it certainly doesn't hurt anything...)
  • Ladle your batter onto the pan.  Watch as bubbles starting to form around the edges.  When this happens, peek under your pancake to see if the it's gotten to the desired level of golden-brown-and-delicious.  If so, flip it over, girlfriend. (2:50 on the video)
  • The second side doesn't have the nifty bubbles indicator, but cooks much faster.  I would peek after 30 seconds.
  • We line a plate with a kitchen towel and fold it over the finished pancakes while working on the others.  This keeps them both warm and moist.
This recipe is fluffy with just the right amount of tang to go along with a syrup (or try with honey!) and delicious breakfast meat.  I hope you can try it the next time you're jonesing for some pancakes.


Wednesday, February 19, 2014

A Week of Alton Brown Day 4: Overnight French Toast

Today's ode to Alton is going to let Alton speak for himself mostly.  The Cooking Channel has edited a bunch of small videos that describe just one recipe from a Good Eats episode.  Some are better than others, but this one is completely perfect.

This French Toast is decadent, not just because of the addition of half & half or rebuttering the pan every time you put a new slice in, but because of the custard.  Soaking the stale bread in the custard is an extra step to be sure, but the texture it creates is like bread pudding: a perfect juxtaposition of crunchy (and buttery!) outside and creamy inside.  This recipe has got it going on.

Alton's video:
http://www.cookingchanneltv.com/recipes/alton-brown/french-toast/altons-overnight-french-toast.html
I very much recommend that you watch this 5-minute video, it is explains things perfectly.

Alton's recipe:
http://www.cookingchanneltv.com/recipes/alton-brown/french-toast.html

My comments about this recipe all revolve around the cooling rack that you use several times in the recipe:
1.  The rack Alton uses is a grid rack, which I used to own.  I HATE THIS RACK.  It is the most impossible thing to clean.  I bought these rather inexpensive racks a few months ago and I'm in love with them.  They're much easier, plus space saving!  And best of all, the legs that elevate the racks a few inches off the counter offer even faster cooling capabilities.
2.  Believe it or not, I've made this crazy contraption that Alton uses in the video for getting the bread dry by unraveling a wire hanger.  Or, I should say, James did.  I still don't think it's as easy or as efficient as simply leaving your bread on the cooling racks overnight.  If you leave your bread out earlier in the evening, turn the bread over on the racks before you go to bed.  This enables the bread to access the most air possible and keeps it dry.
3. Instead of putting just the rack into the oven to let the custard set, I put the entire rack and pan into the oven.  It has always worked for me!

Super easy and fun recipe for a relaxed weekend morning. :)

Tuesday, February 18, 2014

A Week of Alton Brown Day 3: Chocolate Chip Cookies

The Chocolate Chip Cookie is, I believe, the most perfect cookie.  Nay, the most perfect dessert in existence.  The combination of crunchy exterior and chewy, soft interior, the brown sugar, the big chunks of chocolate - what's not to like?  Cake and pie and ice cream can't compare.  (Although a custard shop near my apartment called The Dairy Godmother makes a Tollhouse Cookie custard, which is pretty damn close.)

There are a lot of Chocolate Chip Cookie recipes out there and, of course, I turned to Alton to give me the ultimate recipe.  This is a favorite because you don't need to use a mixer to make it.  I've arranged my kitchen so that my mixer is in a very easily accessible place, giving me as few excuses as possible NOT to use it, but still a recipe that doesn't require the mixer seems easier.

I make only two changes to Alton's recipe:
1.  At the end, before scooping out the dough, I add 4 Tablespoons of milk.  For whatever reason, this dough comes out a bit crumbly and is difficult to scoop into cookie balls for baking.  I often have to form the balls with my hands and really compact the dough together in order to keep it's shape - it's very time consuming.
Packing the dough into the scoop so it stays together.

The little mounds it makes.

ARGH!  Why are you so crumbly, dough?!
Therefore, the addition of milk makes the dough just wet enough to scoop.  This completely changes the structure of the cookie which you can see in the pictures below.  But, in my opinion, it's for the best.
Wet dough, much easier to scoop!

2.  I use salted butter AND add salt to the recipe.  I call this my secret weapon for this recipe.  I do not think this results in a salty cookie, but, rather, one with a salt element.  Alton advises against using salted butter in your recipes because you cannot control how much salt a specific brand of butter uses - and if you use different brands each time you make a baked good, how can you control the salt?  I think this is a perfectly fair point - but let's just say I've been using salted butter my entire life and I've always been happy with the results.

Ingredients (Wet):
1/2 pound of salted butter (2 sticks)
3/4 cup white granulated sugar
3/4 dark brown sugar, lightly packed (yes, sugar is considered a wet ingredient!)
2 egg yolks, beaten
2 teaspoons of pure vanilla extract (oops, I made three changes!  I added an extra teaspoon of vanilla extract.  I'm gonna start doing this with all baked goods now: vanilla is typically used to enhance the other flavors, but the flavor of vanilla is just so good - I want more!)

Ingredients (Dry):
2 1/4 cups all-purpose flour (I actually used Trader Joe's 100% White Whole Wheat Flour to much success, but more on that later)
1 teaspoon baking soda
1 teaspoon kosher salt
2 cups semi-sweet chocolate chips (equal to 1-12 oz. bag of chips)

Finisher:
3-4 tablespoons milk

Here's the order and process I use:

  • Melt your butter
  • Once the butter has melted, then measure out your ingredients in two separate bowls.  Do not add the butter until all the ingredients have been measured, so it has time to cool slightly.
    • Separating egg yolks from egg whites can be tricky, but there's several utensils out there to help you out.  Some people swear by using the egg shell to separate or even your fingers, but I find this guy pictured here to be best.  It came with my measuring cup set, but can be found for pretty cheap online.  
      • Just crack your egg (I use the counter covered with a paper towel, as Alton suggests, so as not to ram egg shell into the egg itself) and empty over the separator.  Then gently jiggle the egg white off of the yolk.  The last bits of egg yolk can be a little difficult to jiggle off, so you may want to use your fingers.


    • The Trader Joe's Whole Wheat Flour didn't really change the flavor at all in the baked cookie (I could taste it in the raw dough), and adds fiber to your baked good.  I call it a win-win!
    • I sift all my dry ingredients by shaking a hand-held sieve.  Alton likes to put all his dry ingredients in the food processor and pulse about five times.  I've tried this and it is faster - but washing the food processor takes longer than washing the sieve.  So I prefer the sieve.
      • The whole wheat flour does not sift all the way - there's little chunks that were bigger than my sieve holes.  I just threw that back in the dry ingredients when I got to the end.  Sifting is more a process or aerating than it is fishing out big chunks.
  • Pour your melted butter into the other wet ingredients and thoroughly combine.

  • Pour your wet ingredients onto the dry ingredients and fold gently until just combined.  Don't worry if there are streaks of flour in there.

  • Then add your milk, one tablespoon at a time, until the dough is wet enough to scoop easily.  (I've actually never done this with a full recipe.  I've gotten pissed off half-way through scooping and added 2 Tablespoons of milk to half a recipe.  So logic would say that a full recipe would need 4 Tablespoons, but I would go slowly just in case.  Don't let me ruin your cookies!)
    Adding the milk

    Easy to scoop!
  • Scoop your cookies out onto pans that are lined with parchment paper or these nifty silicone mats, which are both nonstick.


  • Bake your cookies for 15-17 minutes, depending on your oven.  Mine took 15 minutes.
    • Every five minutes, I rotate my cookie pan 180 degrees and switch the cookie pans on the racks.  This ensures that the cookies cook evenly - none are more crispy than the others.
  • Let your cookies cool on the pans for 2 minutes before transferring them to cooling racks.  This accomplishes a few things: 1. It allows the cookies to cool down more gently. 2. The cookies will firm up so it's easier to transfer them to the cooling racks. 3. It allows your cookie sheet to cool down before they next batch of dough goes on.
    NOM.
    • I used to ignore the cooling stage in many cookie recipes and it never ruined any cookies.  But I do notice that this short amount of time allows my cookies to be more uniform - the dough never starts melting before the cookies get in the oven.
      Without milk on the left.  With milk on the right.  See the difference!

  • The recipe yields about 40 cookies.
  • Eat your cookies warm - that's when they're best!

I've been getting lots of good feedback about the blog so far and I thank you so much for reading!  If you've got a pro tip, a question or a comment, please share in the comments below!  The whole point of writing this blog is to share and learn - so let's start a conversation! :)